 After two months, I am finally getting some moving announcements out. I actually wasn't planning on sending any but then my family said that they liked the ones we sent out from our last move and wanted to know when to expect the new ones.
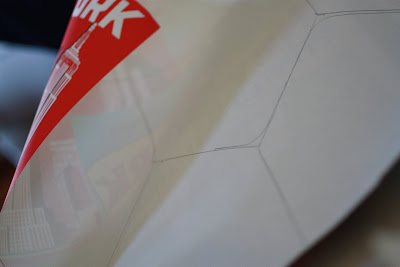
Thus, I went to the drawing board. For inspiration I went for a walk in Rhinebeck and popped in and out of many shops. When I got back home I was still fuzzy on what the final product might look like, but I found this fun Cavallini New York wrapping paper at Paper Trail and thought that it would make a fabulous envelope liner to whatever I decided to do.
If you have not started creating custom liners for your envelopes...don't start...it's addicting. When I am doing a stationary project, a regular envelope seems unfinished without a liner; it doesn't have the right heft. Besides, lining an envelope is truly simple and I was able to crank these out in less than an hour.
For custom stationary projects I mostly use Paper Source paper/envelopes; further, I have found that many specialty paper shops, such as Paper Trail carry the PS line, and many designers use Paper Source products to create their merchandise.
I purchased envelope liner templates from PS back in 2007 when I was planning our wedding, and I have used them for projects ever since.
 You can use virtually any paper that fits your fancy; you do not want to use a paper with a heavy weight because ultimately you'll need to fold the envelope, so keep this in mind!
Step 1: Trace the template onto the paper with a pencil on the back side of whatever paper you choose.
Step 2: cut it to size and use some sort of adhesive to adhere it to the inside of your envelope. I generally use a glue stick because it is cheap, but double sided tape, especially the tape runner variety or Zots would work well also.
Step 3: after it has a chance to dry I use a bone folder to create a crisp crease along the fold. The back of a butter knife or a ruler will work as well.
Step 4: admire your chic new envelope.

I am super detail oriented (to a fault Dan would say); this drives him crazy because at times I lose sight of the big picture wanting to get all of the details just right.
When I am working on a stationary project, even the stamp matters. I decided on the cowboys because I thought they were apropos.
 Continuing in the details realm; the year after Dan and I were married I purchased an embosser with several different custom plates. The one that I use the most on envelope tails is my "d&p" (shown above).
 Okay, so I've talked envelope extensively, now you are wondering what does the card look like right?
I originally designed a simple text with need to know info on PS Paper Bag colored flat paper. However, I then found these beauties above on Etsy from Simplicity Papers. I pitched the idea to Dan (since we have a mini cooper named Walter) and he loved them almost as much as I did.

They went in the mail today, so fingers crossed that folks will like them when they arrive.
Disclaimer, if you do not receive one of these, it is not because I do not love you, it is merely because we have a haus of a family and I only ordered a small amount. Secondly,we tried to limit them to those folks who send us mail and would put them to good use.
Moral of the story, if you haven't sent us mail in a while, family or not, you were axed from the list. I fully anticipate a call from my mom and my mother-in-law because aunts and uncles were among the cuts!
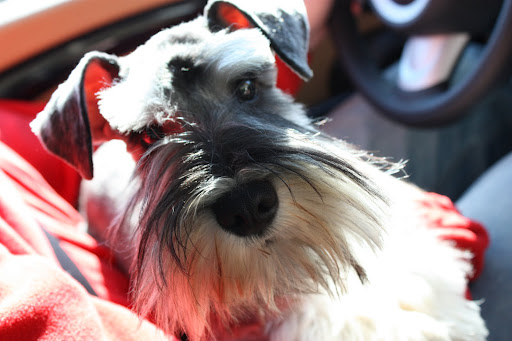
 Remi was not happy that I spent most of the afternoon crafting. After work, I typically curl up with a book and my cup of coffee on the chaise, therefore creating the perfect spot for him to nap. However, yesterday was dedicated to cleaning and crafting so he sat by the edge of my chair waiting patiently for me to finish so that he could take a proper nap. I couldn't resist snapping this between lining my envelopes; he was too cute.

No comments:
Post a Comment